- Getting started
- Installing Theme and Plugins
- Demo Content Installation
- Theme Options
- Sidebars / Widgets
- Setting the slider
- Setting the pages
- Setting the Blog
- Setting the Portfolio
- Setting the Team Members
- Setting the Testimonials
- Setting the Client's Logo
- One-page site
- Visual Composer
- Setting WPML Multi-Lanuage
- Translation
- Shortcodes
- FAQ
- Sources / Credits
Theme Options
Theme Options
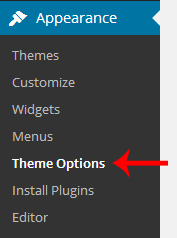 You can customize Erica settings via "Theme Options". You can upload logo or change skin color etc. Here are details of each section that you can customize.
Layout Settings
You can change Layout related changes here. Like you can switch to Boxed or Wide layout, or you can select Skin color or you can on or off responsive design from here.
Skin Color

This is the global color for all hightlighted things. This color will be used in Tabs, Accordion, Progress bar, text link and other areas. We have provided some pre-defined colors for you which you will also find on our demo site.
Favicon Settings
You can upload different favicons for the site. There are different type of favicon that used by different devices like iPhone, Android, Microsoft etc.
Font Settings
You can setup and change fonts for different like Genral fonts, H1 heading fonts etc. You can customize font-family, font-style, font-size, color, line-height and backup font. We provided 650+ Google Webfonts to choose from. Also you can see preview of each font here.
Floating Bar Settings
Floating Bar will be appear above Topbar. This is expandable/collapsible area. There is small icon to open/close it.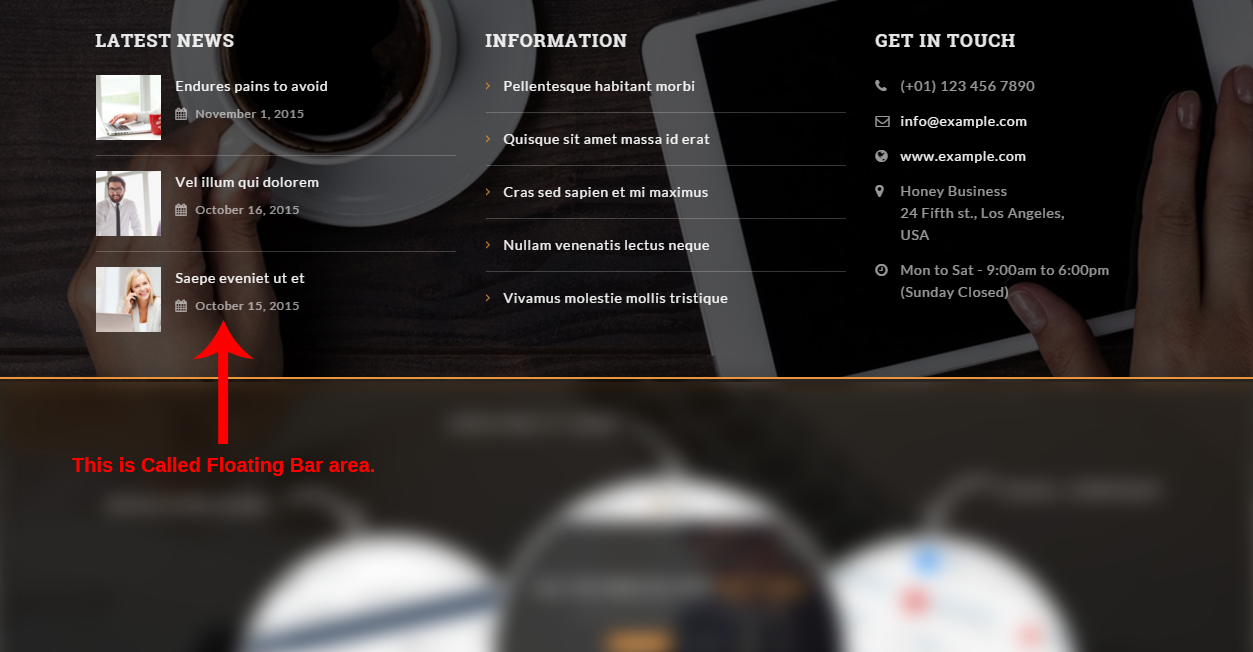
This area shows widgets. You can add widgets in Admin > Appearance > Widgets > Floating Header Widgets and all widgets will appear here. Also the area is DYNAMIC WIDTH ready so if you add 2 widgets than it will show widgets in two column. 
Topbar Settings
Topbar is a shortcut info bar for your clients. You can provide email address or your phone number here so visitor can contact you instantly. Also you can show social icons here.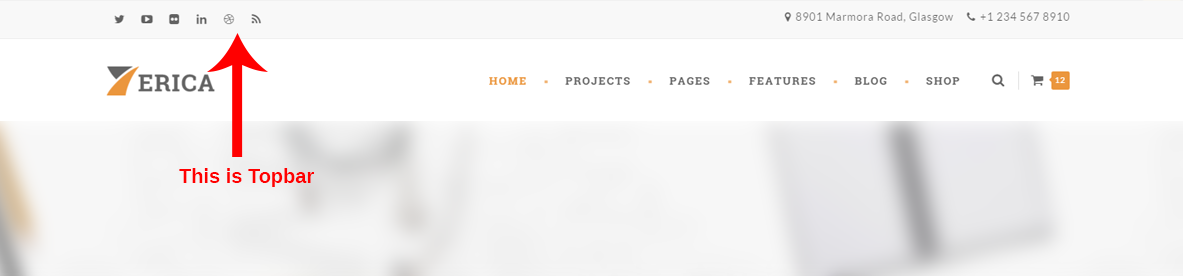
Titlebar Settings
You can change settings for Titlebar from here.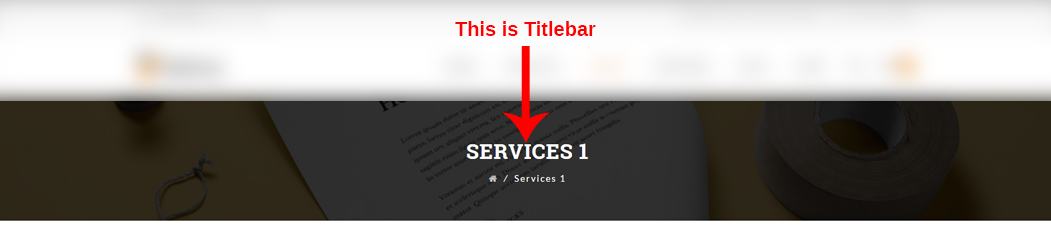
Header Settings
You can change header settings from here. You can upload logo, enable or disable sticky header etc.
Erica theme comes with three header styles. Here are description of each design:
- Left Logo with Right Menu: This will show logo at left and menu at right. This is default header style.
- Center Logo Above Menu: This will show logo at top and menu below it. This is perfect design for bigger logo.
- Center Logo Between Menu: This will show logo between menu. Here are some options for this:
- You can decide where the logo should appear. Example, if you like the logo to appear after "Services" menu, than just edit the Services menu (from Admin > Appearance > Menus section) and add
logo-after-thisclass to it. Here is the example view: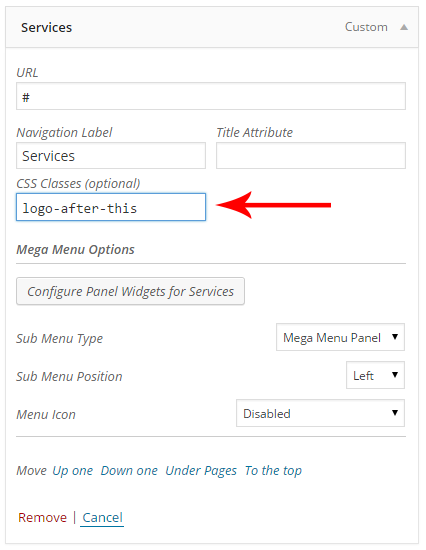
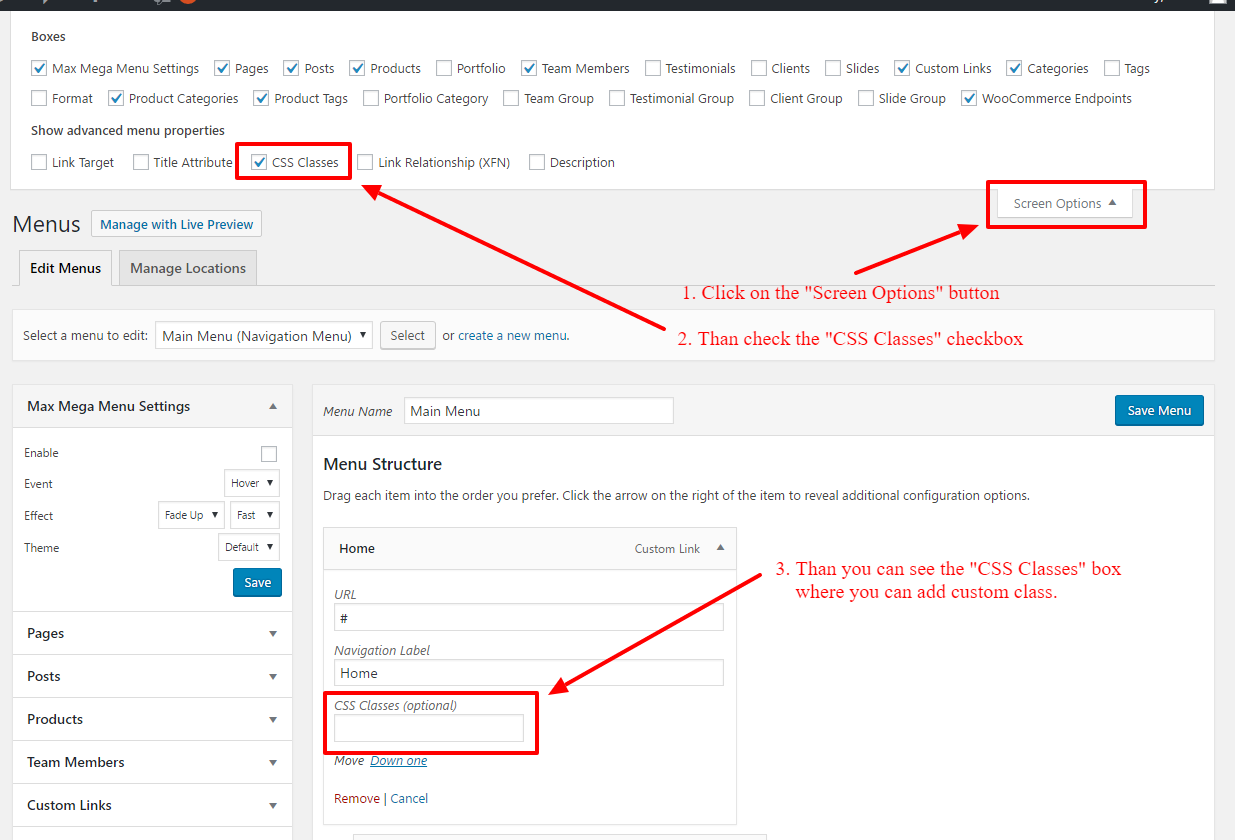
Note: Please note that the "CSS Classes" option will be hidden by WordPress directly. So if you can't see this "CSS Classes" option, than just go to Admin > Appearance > Menus section. Than click on the "Screen Options" button at top-right corner. Than check the "CSS Classes" checkbox and you will see the "CSS Classes" box to add the class. See screenshot given below for more details:
- You can set the width of logo area too. Go to Admin > Appearance > Theme Options > Header Settings section and set the "Logo Area Width" option:

- You can set the menu alignment too. You can move the menu at left or right. Go to Admin > Appearance > Theme Options > Header Settings section and set the "Menu Left margin" option:

- You can decide where the logo should appear. Example, if you like the logo to appear after "Services" menu, than just edit the Services menu (from Admin > Appearance > Menus section) and add
Menu Settings
You can manage menu and sub-menu (dropdown menu) settings from here. You can also change Responsive Menu Breakpoint from here (from which display size the menu will become single icon mode). You can change Font-family, font-size, font-color, background-color etc properties for both main-menu and sub-menu both.
Footer Settings
You can change footer text from here. You can use the following shortcodes in your footer text: [tm-site-url], [tm-site-title], [tm-site-tagline] and [tm-current-year]
Login Page Settings
You can login page background image, background color and other setttings from here.
Blog Settings
You can change settings for Blog section from here.
Team Member Settings
You can settings for "Team Member" section from here.
Portfolio Settings
Change settings for portfolio
Error 404 Page Settings
You can change Error 404 page content from here.
Search Page Settings
You can change Search results page settings from here.
Sidebar
You can change Sidebar related settings from here. Also you can create a new sidebar from here.
Social Links
You can set URLs from Social links from here. Also you can enable or disable RSS feed link from here.
WooCommerce Settings
You can change settings related to WooCommerce from here.
Under Construction Site
The Erica theme comes with built-in Under Construction mode so you don't need to install any other plugin for it. You can enable it from here. You can change text and background settings from here. Here are steps:
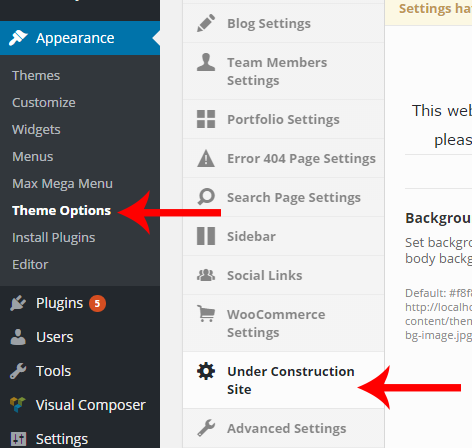
- First go to Admin > Appearance > Theme Options section and go to "Under Construction Site" tab.
- Than enable it by selecting YES in the Show Under Construciton Message option.
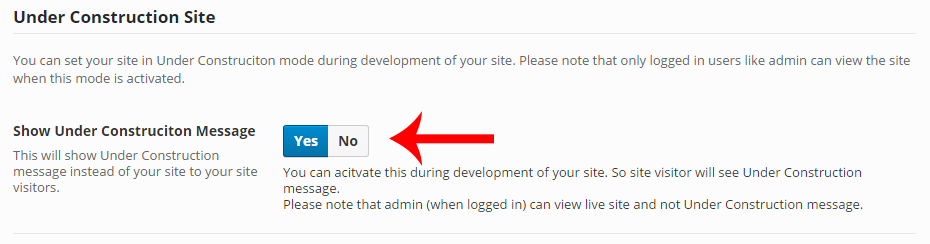
- Now you will see other options like content and background settings. Just change it if you like to.
Advanced Settings
You can set advanced settings (like SLUG for different post type) from here.
Custom Code
You can write your custom CSS or JavaScript code here. Also you can add Custom CSS Code for login page too.
Theme Information
You will get theme details like version and developer details from here.
Import / Export
You can import or export theme settings from here. This will be usefull when you are developing your site on other server and want to move only theme settings. Just click "Download" button to export the settings and click "Import from file" button to import it.
Note: When you click on "Import from file" than it will open new textbox. Just open the downloaded file in any text editor and copy paste code here to import.